Pages

Monday, February 25, 2019

Self Care And Empathy Are Not Binary Ideas

Watching the Twitter feed and I came across a post that suggested that people need to separate themselves from people that are unhappy. Specifically,

If someone in your life is unhappy, let them be unhappy.
Get over it, let it go and be happy.

This bothers me in a few ways.

First, there is nothing wrong with being unhappy or sad. Sadness is an ok feeling to have. Watch the movie Inside Out if you need more info on this topic. Our brains need to process sadness. It is good to be unhappy at times. Don't bail on people that are unhappy. That is ridiculous.

Second, if the tweet is about people that are perpetually unhappy, why would you bail on them? What if, like me, they deal with depression and can't help but be unhappy for long stretches? I don't know where I'd be if people moved on from me because I was too unhappy.

Or perhaps the second line is for the people that are unhappy? There is nothing worse than telling a depressed person to get over it, let it go, and be happy. Oh, wow! Depression cured! What insight and wisdom in a single tweet! I don't think that is what the second part of the tweet was suggesting, but just in case, I wanted to address it.

Lastly, for those that suggest this is about self care and that people need to take care of themselves before they can help others, I get it. That is not what the tweet says at all. Self care is critical for all people, not just teachers. A part of self care is knowing that there are people around you that you can connect with when things are tough. Being comfortable to talk to others about serious issues is part of self care. We all need to practice self care, but that doesn't mean shutting the door on everyone else.

You can practice self care and be empathetic to people dealing with sadness. They are not binary ideas. There is a reason someone is sad. It could be depression, the feelings of a lost loved one, a feeling a failure, or any other reason. We are allowed to be sad and we need to be there for those that are feeling unhappiness.

I truly hope that if you are reading this, you will take a moment to think about those that are unhappy in your life, or even your classroom, and think about how you can be there for them instead of how you can move on from them.

#WordsMatter and complex ideas are not meant for cute little Twitter cards. Remember that the next time you get ready to tweet.

Friday, February 22, 2019

Just Make It #MakerEd

I've had some conversations about making in the classroom lately and I feel it always comes down to me telling teachers, "just let them make".

Teachers can often overthink certain aspects of the curriculum or instruction when all that needs to happen is getting out of the way fort he students to create. I have found some of the most amazing things done in the classroom is when the teacher removes themselves from the equation in some way.

Some might read this as a shirking of a teacher's responsibility of teaching students, but they teacher is teaching them something by letting them go. That freedom to make brings so much to students that sitting and listening to a lecture cannot do. The freedom to make supports student creativity and drives their engagement.

Maybe I'm stating the obvious, but why don't we let students just make it? What are the reasons that keep us from letting them do just that?

Wednesday, February 6, 2019

Cool Hardware I Saw at #FETC

I've been meaning to write this post sooner, but I have been so swamped with Snow Days and working with students in ELA classrooms to write their own text based computer game, this got pushed back. I'm excited to show off some cool things I saw while at FETC in Orlando.

Makerbot Method


I had a chance to stop by the Makerbot booth and check out their new printer, the Makerbot Method. This is a beautiful printer. It is fully enclosed and has this awesome feature that circulates warm air all around the print to prevent warping. Traditional printers only have a heated bed. This was an awesome addition to the printer. The dual head extruder is also very important addition to the Makerbot line. Being able to print in multiple colors or use the soluble filament to create items that need support is a big step in the right direction for Makerbot. The full body metal design prevents flexing that can cause issues on fast print jobs.

I watched the printer in action and I was very impressed at the speed and the quality of the prints. In an educational setting, I see the Method being used in advanced design classes and Makerspaces that are being used by people with serious design skills. With a $6500 price tag, this is not your casual purchase for your space. Long term, I think Makerbot has created a high performance desktop printer that can really add a nice option to any school or Makerspace that is in need of quality print jobs for finished products.

HoverCam Pilot 


I was wandering the floor and I was drawn to this podium like a moth to a flame. I am always looking for things that might be able to support the design aspect of the makerspace. I want to make it easy and fluid to share work with students and for them to share their work with others. Having a wireless podium that can share my computer screen, iDevice, or something I'm drawing with their document camera has everything one would need in a single device. I was super excited at the possibilities of the HoverCam Pilot. The mobile podium also allows the user the freedom to move about a space and go to students instead of students having to get up and come to the front of the room. With a distance of 50ft, you can move far away from the screen and still be connected. I like that because it does not force someone to still be stuck to the front of the room.

The Pilot has a Windows computer built into it, but you can add your own device to showcase work. I was thinking about how adding Minecraft to the Windows device would allow me to showcase student work to everyone on the screen very easily. I also love the attached document camera because student designs and sketches take physical forms, not just digital. I like the idea of having a student being able to easily share their work on the podium for the class to see. I think it creates a wonderful environment that supports design and sharing.  You can check out the full specs on the Pilot here.


TRUTOUCH RS Series


Whenever I go to a conference, I seem to notice their are more "screen" companies out there on the expo floor. I tend to get frustrated with some of them because they require specific software to run their screen. I was really excited to talk to the people at Newline-Interactive because their TRUTOUCH monitors are amazing and do NOT require proprietary software to work on your device. The user interface on the screen is one of the most intuitive I have ever come across. You can even personalize objects on the screen to pull up commonly used apps on your device. That is awesome! I have found that some screens and software are super complex to get started and use and teachers do not have the time to explore those hidden menus to get to what they want.

The screen comes in 65", 75", 86", and 98" sizes to suit your visual needs. As I look around the Makerspace, having a board that allows students to connect and share without the need to download specific software is a nice solution to have in any classroom. You want sharing to be seamless and the RS Series allows for that to happen. You can actually connect up to 4 screens to the board and switch between the ones you want to see at any time. You can also instantly annotate on the boards to get ideas out quickly. I love the ability to annotate on boards so the ideation process can be fluid. If you are looking for a simple screen solution that does not make you beholden to software licenses, you need to check out the TRUTOUCH RS Series. I think it will be exactly what you need.

Root


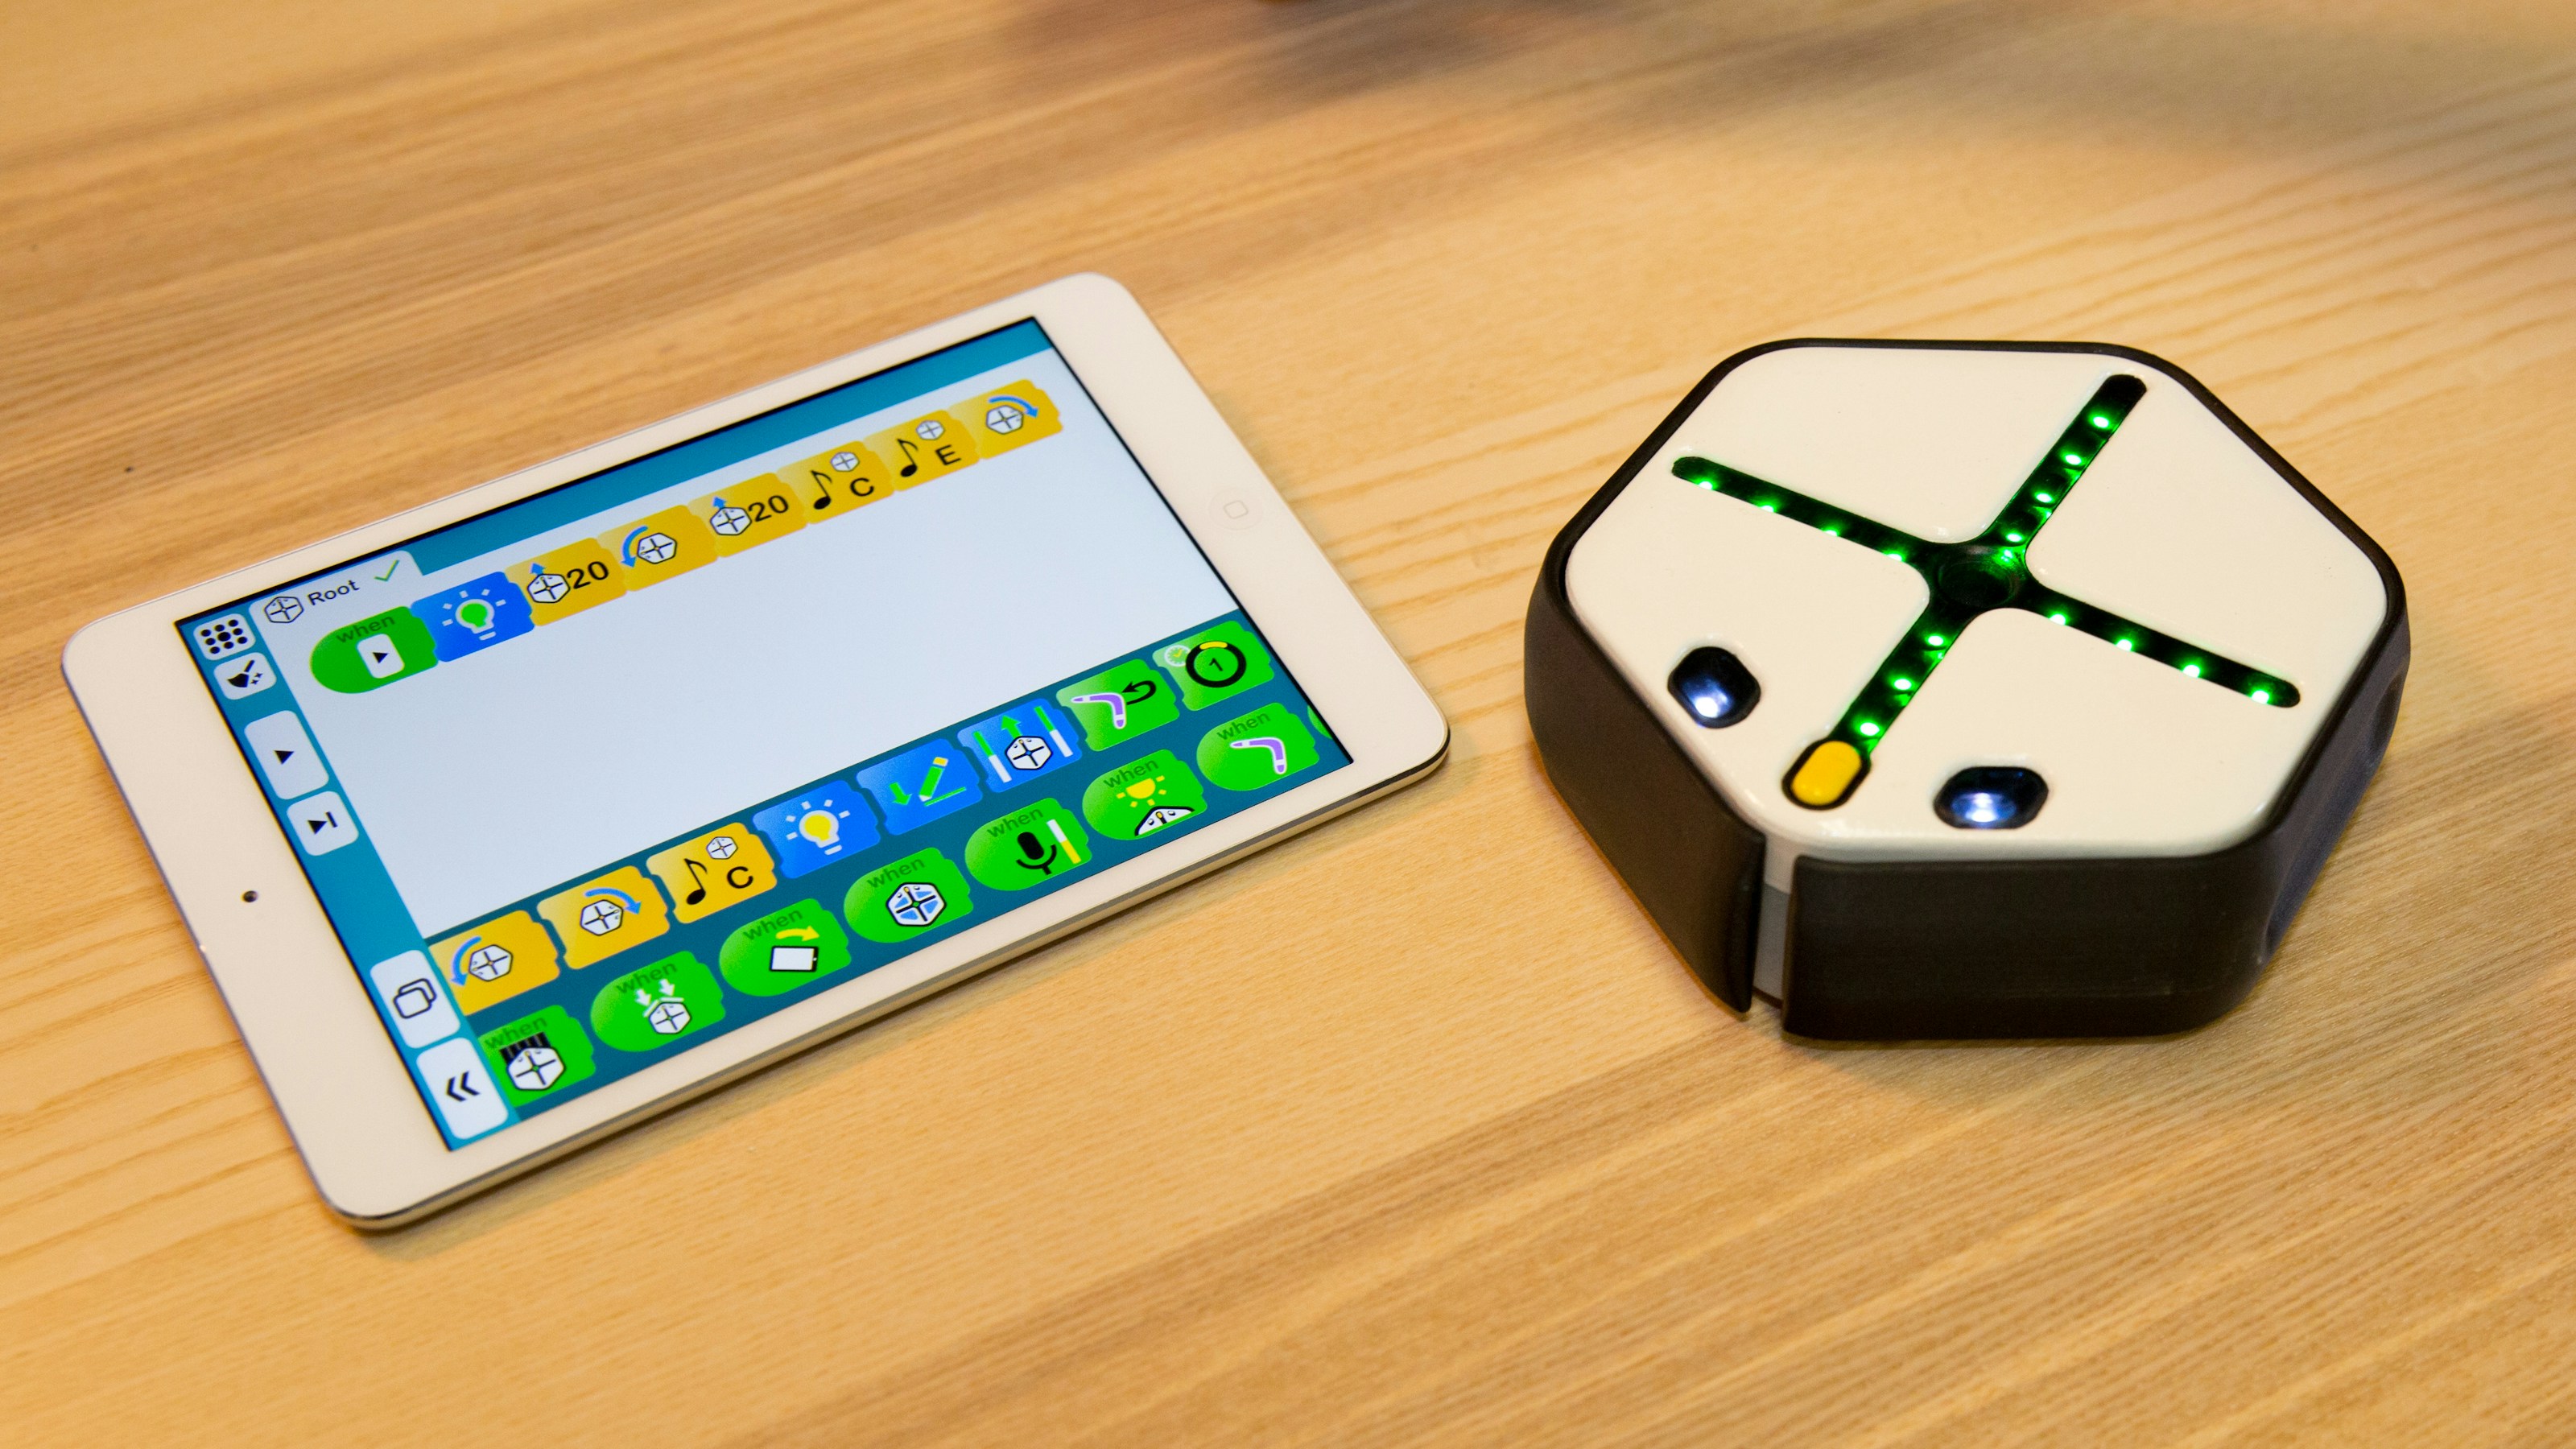
I have to share about Root here because I think it is such a cool tool to support young learners who might be interested in coding. Root is one of the more diverse coding robots I've seen out there and it can do some pretty cool things. It can draw. It has four touch panels on the top. It has touch sensors that enable it to bounce off walls. It has strong magnets that allow it to move around magnetic surfaces, including walls! It can scan for colors and react to what your draw based on your code. It can erase lines you have drawn. A light that you can code and a light sensor that can react to changes in brightness. It can even play music you compose through code.


Through a simple block based app, you can control what the Root does and when it does it. I had a chance to play with the Root and I loved the UI on the app and the ease of adding the marker and having it draw out the coded designs. There are so many different uses for the Root, I think it is a nice addition to any classroom looking to add some code based robotics to the mix. 


Saturday, February 2, 2019

Coding Text-Based Gaming in ELA #NCTEChat

I am always looking for different ways to engage students in ELA classrooms. As a gamer, I've been looking for a fun way to engage student gamers in the classroom and I think I have found a very fun way to do that.

One of the oldest types of computer games were text based Role Playing Games (RPGs). You would be given test based descriptions of what was happening and you would have to type what you wanted to do next. You could travel from one place to another by typing in "go west" or some other direction. You could pick things up and use them as needed as long as you typed the instructions. I thought that creating a text-based RPG would be a great lesson for students for a few reasons;

  • Story-telling - Students need to work on telling stories. Creating a narrative around a game they are creating is a fun way to practice their writing skills. Building a plot, creating a protagonist and antagonist, and working on their descriptive writing are skills that writing for a game can help enhance.
  • Proofreading - Proofreading code to make sure everything is where it needs to be to run properly is crucial. These proofreading skills need to constantly be practiced. The importance of punctuation in coding is the same as the importance of punctuation in standard writing.
  • Interactive - Writing a game and being able to play it and share it with friends to play is a more interactive way to write. Any errors in writing that are found while playing can be shared and debugged later. 
  • Differentiated - Writing the code for this game can become a very complex game or a very simple game depending on the person writing the code. This allows all different skill level writers the chance to explore story-telling through code in ways that meet their skill set. 
  • It's different - Sometimes, it is good to do a bit of writing that is different than just sitting and writing. This offers a nice way to change the pace of the classroom writing students are used to doing. 
The more that you have your students doing this, the more benefits you will find. Below are the steps I took to laying out the lesson. 

Note: You do not have to know how to code to do this lesson. Do not let the code scare you away. 

Day 1:

I introduced the Raspberry Pi RPG tutorial program to the students. This link is shared on Google Classroom so all students can access it. The program is very nice because it does not ask students to understand the bits of code that are provided, it only asks students to fill in some blanks and recopy what is already given to them. The tutorial is really helpful because it allows the students to work ahead if they are quicker in understanding what needs to be done. The tutorials takes students to an online code program called Trinket. You can have students create a free account so they can save their code and come back to it later. 

As a class, we work together to add one room to the program. By the end of one class period, the students should have added one room to their game. They are asked to try and add another room before the next class meeting. 

Day 2: 

For the second class meeting, we will have students learn to add an item to pick up as part of their game and we will add a monster. The tutorial walks the students through all of this and makes it easy for them to copy and paste in the Trinket website. 

For the next class meeting, I ask that the students have an item and a monster added to their game and 5 total rooms. 

Day 3:

For the third class meeting, we will focus on how you can win your game. After finishing their game, we discuss the different types of stories that you could tell with this type of computer game. Mystery, adventure, space adventure, spooky, etc are all possibilities. The students are asked to start brainstorming a story that they would be able to create a maze-based game around. 

Day 4:

Students are asked to start mapping out their maze that will fit in the narrative of their story. By drawing out their maze room by room, it will make it easier to code. I drew out my map to help me and it made the overall design much easier to code. 

Days 5-7:

Students should be coding their game around the narrative they have created. This is where they can have fun and create the game they really want. By Day 7, they should have something that can be tested with other students in the room. 

Days 8 and 9:

Final proofreading and debugging should take place and the games should be ready to share with the class. Trinket allows users to share links to their games so others can remix them and try them out. Posting those links in a Google Doc or in Google Classroom would be helpful. 

Depending on your students, this can be done more quickly or you can spread it out over time. Since the tutorial is self-paced, this could be something you have students work on a little bit each day. 

Here is the game I created. It is far more complex than the ones that students are working on, but I thought I would really have a go at it. [Update: I added a search feature that can allow players to search rooms for extra treasure that is randomly pulled from a list, but there are rooms rigged with traps, so a search of a room with a trap will cause death unless you have found an amulet to protect you. There is so much more I can add and tweak. I'm becoming a little obsessed with it.]


The game is still a work in progress, but if you want to take a look underneath the hood of this code, follow this link.

If you have any questions, please do not hesitate to reach out to me on Twitter or leave a comment below. I have some very excited students working on this lesson and some of them have told me they have over 10 rooms after only a couple of days. I can't wait to see what they come up with and share them out with the community.